GPS 1 Guidance
Getting Started
Advanced Troubleshooting
GPS 1 Firmware Update
SIM Replacement
Alarm
Charging Indication
Getting Started
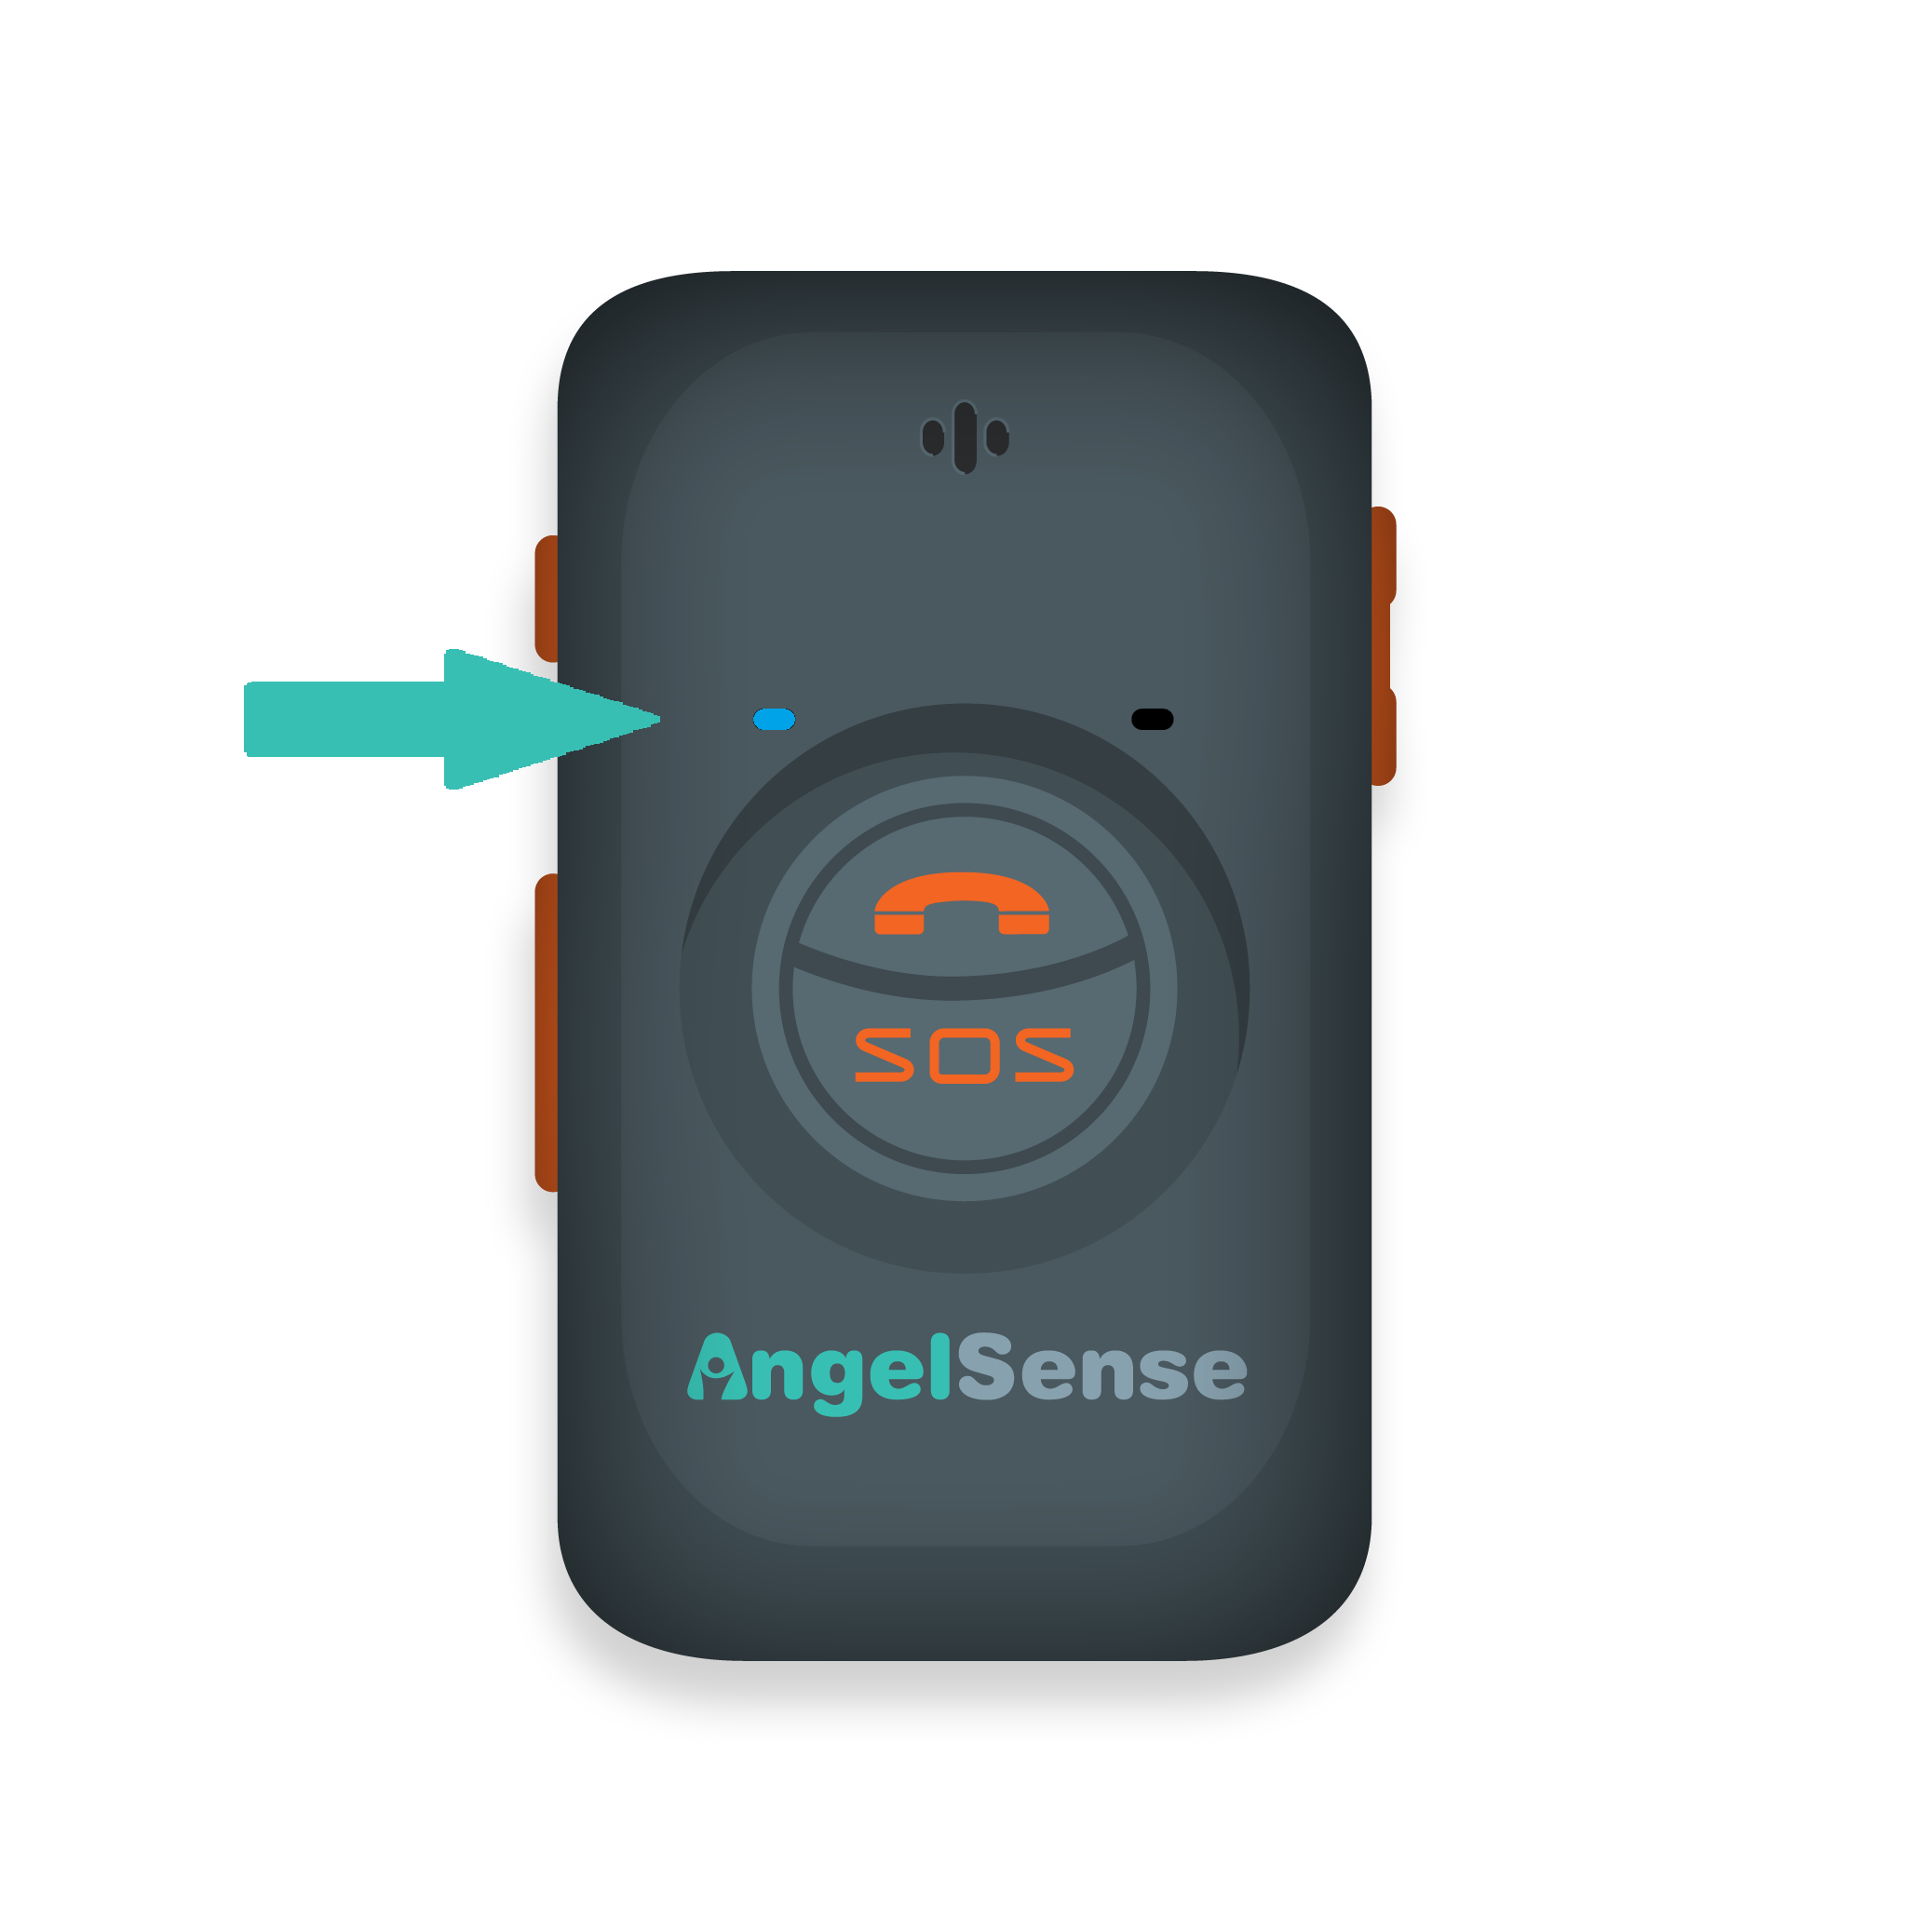
Step 1: Charge the device: When connecting the device to the charger it should turn on automatically, with the blue LED light on solid. It will take approximately 4 hours for a full charge of over 12-14 hours.
Step 2: Download the AngelSense App.
Step 3: Log In to the AngelSense App for further guidance.
Safety Prep & Emergency Search Tools Guide
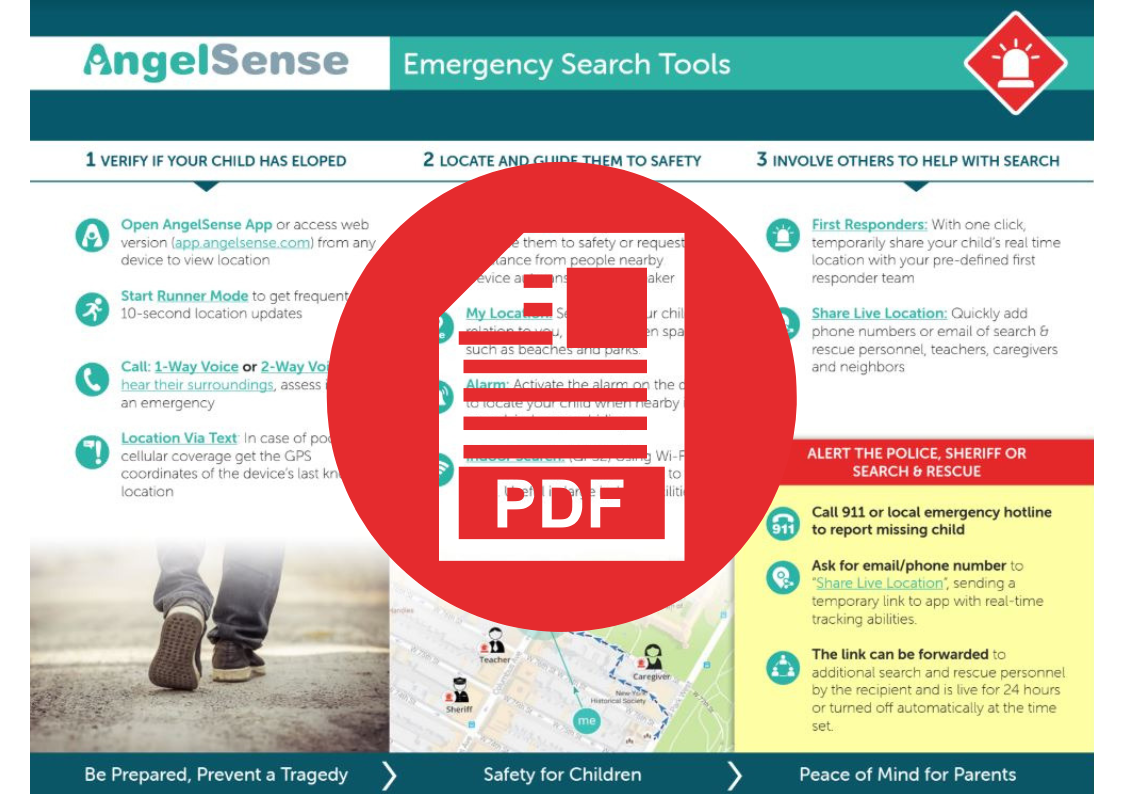
Print out this step by step guide, which takes you through all the AngelSense features so that you are prepared in case of an emergency. Keep it handy as a reference guide and give it to others that you have added to the app (Grandparent, teacher, caregiver).
DOWNLOAD: Safety Prep & Emergency Search Tools Guide
Advanced Troubleshooting
GPS 1 Charging Issues
If your GPS1 device does not appear to be charging, please try these steps:
- First, make sure your app is showing the most up to date information by logging out and back in or force closing.
- Take your device out of the plastic cover, sleeve or belt.
- Verify it’s charging. For GPS1, the blue solid light means it’s charging. (See: Charging Indication).
- Charge in an alternate outlet. If your device is able to charge in an alternate outlet, then the outlet is most likely the issue.
- Charge with only the USB portion of the cord. If your device is able to charge with only the USB portion of the cord, then the charging cord is the most likely issue. Buying accessories
- Charge with an alternate charging cord. If your device is able to charge with an alternate cord, then the charging cord is the most likely issue. Buying accessories
- Leave the device on the charger for about two hours so that it will have some battery power.
- After about about two hours, unplug the device.
- Press the SOS button to see if the lights come on momentarily.
- If the lights do not come on:
- The device is powered off. Try Powering the device on.
- If the lights come on:
- The device is powered on and, assuming the network selected for the device has coverage in your area, you should see the app updating when you take it out in transit:
- Try taking the device out in transit at least 5-10 miles outdoors away from the charging location. This way the device can fully connect to local towers and GPS in the area.
- Enter Runner Mode
- Wait for a minute, the status bar should show the app is updating with fresh location
If these above steps do not resolve your issue, please move on to the troubleshooting steps below.
GPS 1 No Signal
1. Please go ahead and break the seal. *Note that it is OK to remove the sticker on the device and remove the battery (as detailed below). This will not void the device warranty, as you are troubleshooting. Please be sure to insert the device back into the case once done.*
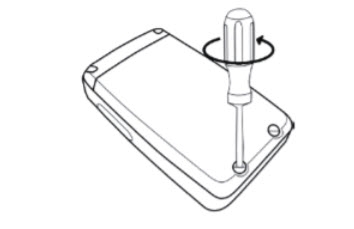
2. With the back panel facing you, remove the two screws to release the back cover. You will need a small screwdriver. If you do not have a small screwdriver, you can try using a pair of tweezers or very carefully using the tip of a knife.
3. Lift up the back cover from the notch at the bottom of the device.
4. Take the battery out
5. Try to carefully clean the golden ports in the device with a soft cloth.
6. Remove the SIM card and reinsert it, making sure to lock it in place. See this Video for guidance.
7. Put the battery back in, inserting the contacts side of the battery first
8. Gently push the battery cover downward until it locks into place. Then fasten the two screws on the back cover.
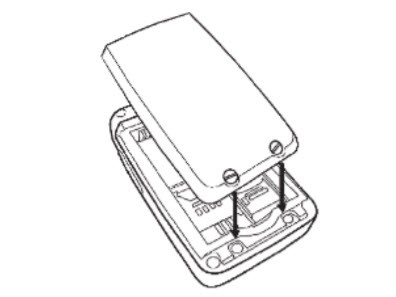
9. Plug the device in so that it will power it on and wait 5 to 10 minutes to allow it to gain a charge.
10. If your device does not power on, please contact us.
13. If your device does power on, please try taking the device out in transit at least 5-10 miles outdoors away from the charging location. This is very important in order for the device to fully connect to local towers and GPS in the area.
Please contact us at support@angelsense.com once these steps are done. In order to help us resolve your issue faster, please let us know if the blue light is staying on solid (not blinking) when it is plugged in and that you have done all of the above steps, including taking the device out in transit.
ALL OTHER GPS1 ISSUES
- First, make sure your app is showing the most up to date information by logging out and back in or force closing.
- Your device power button is disabled by default
- To enable the power button temporarily, go to the app web version, go to Main Menu > Settings > General > Enabled > Save
- To power off the device, hold down on the power button for 7 seconds
- To power on the device, hold down the power button for 3 seconds or plug it in
- Plug the device in and allow it to gain a charge
- Go back into your app to disable the power button, go to the app web version, go to Main Menu > Settings > General > Disabled > Save
If your device does not power on, please be sure that you have done the Advanced Troubleshooting steps and then contact us.
If your device does power on, please try taking the device out in transit at least 5-10 miles outdoors away from the charging location. This is very important in order for the device to fully connect to local towers and GPS in the area. You can try pressing the SOS button while in transit.
GPS 1 Firmware Update
Follow these step-by-step instructions to upgrade your AngelSense device via PC, to fix the issue and immediately regain cellular service on your device.
Here is a video with guidance on upgrading your device.
Upgrade Instructions:
1.Connect your device to your computer (only PC windows, not Mac and not Chromebook) using the original cable
2. Download this GPS1-Upgrade file to your ‘Downloads’ folder.
3. Go to your Downloads folder in your File Explorer. (If you have a search option on your computer’s status bar, you can search ‘File Explorer’ and go to the ‘Downloads’ folder.)
4. Double click on the “GPS1-Upgrade” folder.
5. Double click on the “Step 1” file

6. Click ‘Extract All’, then click ‘Extract’.

7. Double click on the “Step 1” file again
8. You may get the popup below asking to allow, click ‘More info’ and then click ‘Run anyway’.

9. You may get a message where you will need to click the arrow and click ‘Keep’ 
10. You will then see the ‘Setup Status’ and the green bar moving
11. Once it is done you can click ‘Finish’ (may take a few minutes)
12. Double click on the “Step 2” file
13. You may get the “Port failure” error below, please restart your PC and run Step 2 only again 
14. You may get a popup asking to allow, click ‘More info’ and then click ‘Run anyway’
15. Click ‘Update’
16. Once it is done updating, you will receive a message of “Update Successfully”
17. Click ‘OK’
18. Exit out of the tool by clicking on the X in the top right corner
19. You will get a message of “Sure to quit?”, click ‘Yes’
You are done updating your device!
If you have any questions or are experiencing issues, open your app for additional upgrade options or contact us for help.
SIM Replacement
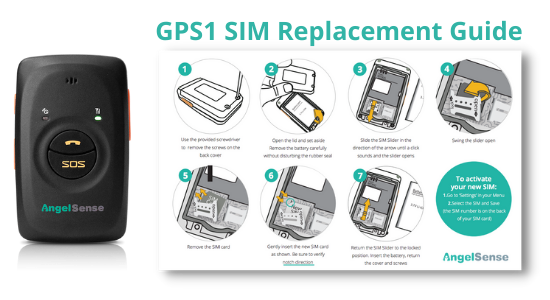
SIM Replacement Guide (GPS1) CLICK TO DOWNLOAD INSTRUCTIONS
- You must activate your new SIM in your app in order to use it. (see instructions above)
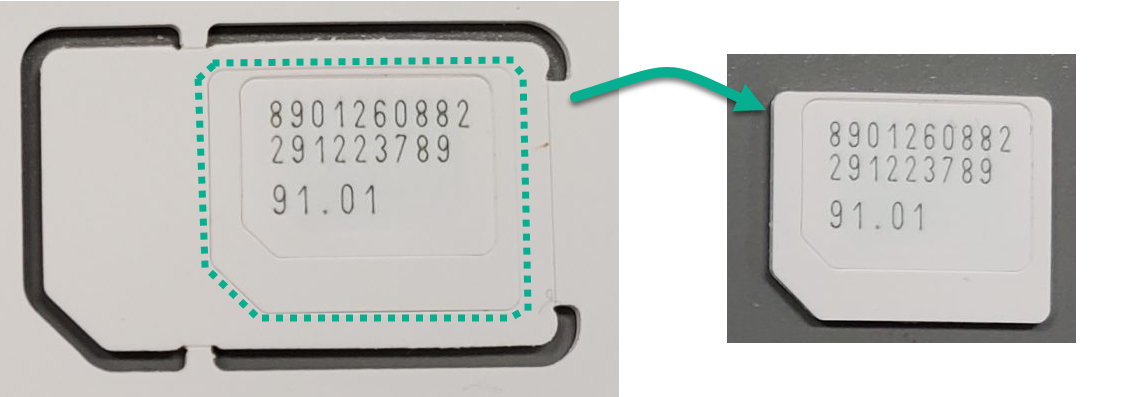
- The SIM will come attached to the card (this is to ensure no damage to the small card).
- Start on a clean, flat surface so parts are not displaced
- Use the provided screwdriver to remove the screws on the back cover
- Open the lid and set aside Remove the battery carefully without disturbing the rubber seal
- Slide the SIM Slider in the direction of the arrow until a click sounds and the slider opens
- Swing the slider open
- Remove the SIM card
- Gently insert the new SIM card as shown. Be sure to verify notch direction
- Return the SIM Slider to the locked position. Insert the battery, return the cover and screws
- Take the device out in transit at least 10-15 miles outdoors away from charging location. This way the device can fully connect to local towers and GPS in the area.
Please note: Do not throw away the old SIM until you have confirmed with our technical department that your device is working properly and nothing more is needed.
Video Tutorial:
Alarm
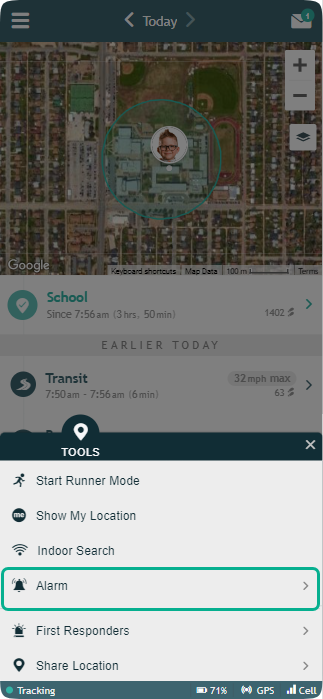
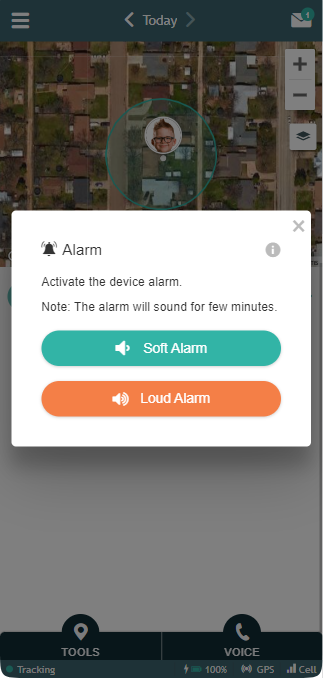
- Open Tools Menu on the bottom and click Alarm.
2. Select either Soft Alarm or Loud Alarm
3. The Alarm will sound for the length of time you have set up in your alarm Settings and then automatically turns off.
4. If you wish to stop the Alarm before the set length of time, you can plug the device into the charger.
GPS 1 Alarm Settings
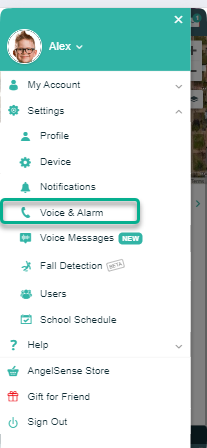
- Open Menu on the left hand side, select ‘Settings’ and select ‘Voice & Alarm’
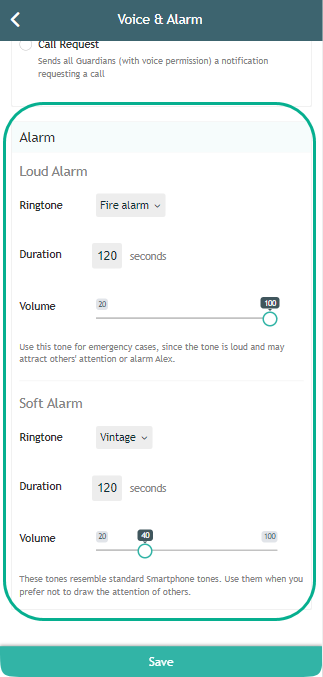
Customize your different Alarm settings for the two different Alarms: Choose a separate ringtone, decide on the duration that it will sound, and adjust the volume.
Charging Indication
When the device is charging, the device’s blue LED light lights up and remains on continuously.
Additionally, you may check the status bar in the web app after a few minutes. When the device is charging, the lightning bolt appears next to the battery, and the battery is colored green.
It will take approximately 4 hours for a full charge.
**We suggest to keep the device charging when not in use. It is best to keep the device charged instead of letting the battery run out.
GPS 1 devices have the power button disabled by default.
- Pressing the power button will not power off the device. It is disabled by default to avoid it accidentally being powered off.
- To turn the device off, if needed, use the app remote shutdown feature.
- To turn the device on, plug in the device.
- To enable the power button, go to the app web version, go to Main Menu > Settings > General > Enabled > Save
Power Button Enabled?
- Pressing down on the power button for 7 seconds, will power off the device.
- Pressing down on the power button for 3 seconds, will power the device on.


